Design Inspiration Supplies
Design Instructions
Supplies needed
- 1 Czech Flower Button (94-6579-12)
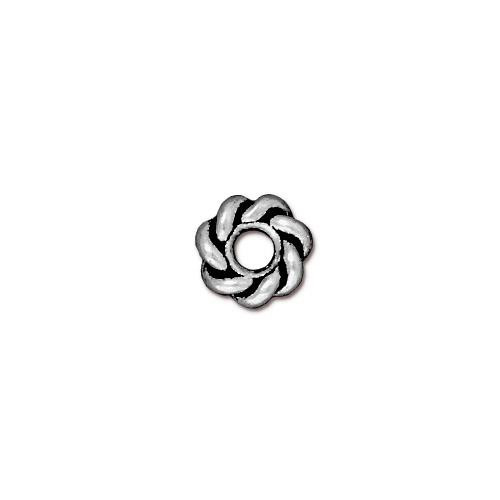
- 1 Twisted 8mm LH Spacer (94-5768-12)
- 38 Size 11/0 round seed beads—dark teal
- 17 Size 11/0 round seed beads—rose
- 17 Size 8/0 round seed beads—purple
- 34 Size 15/0 round seed beads—light blue
- 34 Size 15/0 round seed beads—white
- 17 Size 11/0 cylinder seed beads—lime green
- 17 Miyuki Half Tila beads—matte aqua
- 20" Round 2mm leather cord—black
- Beading needle
- #6 or #8 FireLine® or beading thread of choice
- E-6000® Adhesive
- Lacys Stiff Stuff for substrate
- UltraSuede or similar for back – black
Tools
- scissors
- thread cutters
- plastic wrap
Techniques: bead embroidery, back-stitch
Finished Size: Approx. 14"
Designer: Tracy Proctor
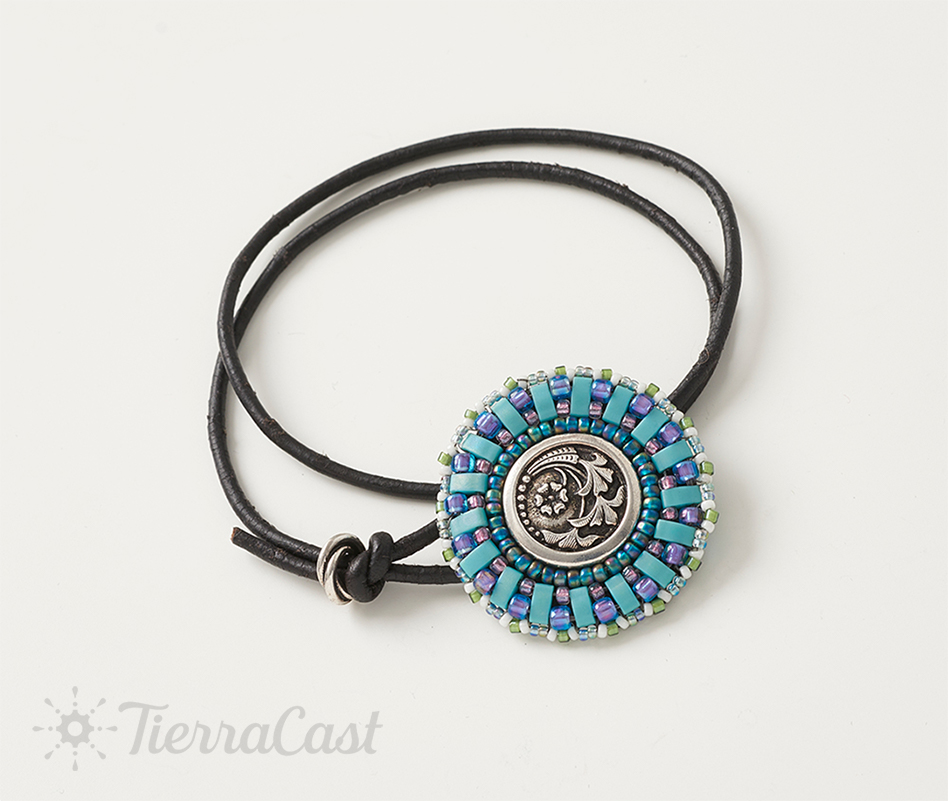
Download the Czech Rhapsody Choker PDF
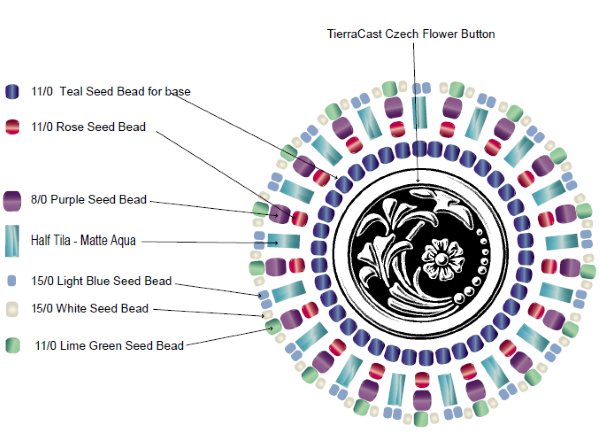
Bead Chart:
Steps
PREPARING THE SUBSTRATE AND BUTTON
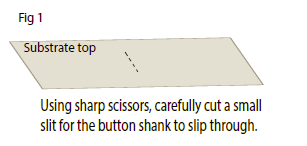
1. Cut a piece of substrate about 4”x 4”. Using sharp scissors, carefully cut a small slit in the center, about ½ inch long. (Fig. 1)
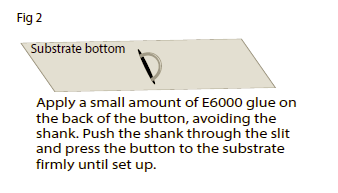
2. Using E-6000 glue, apply a small amount to the back of the button avoiding the shank portion. Push the shank through the slit in the substrate and press the button down onto the substrate firmly until set up. (Fig. 2)
SURFACE EMBROIDERY - BEADING CLOSE AROUND THE BUTTON
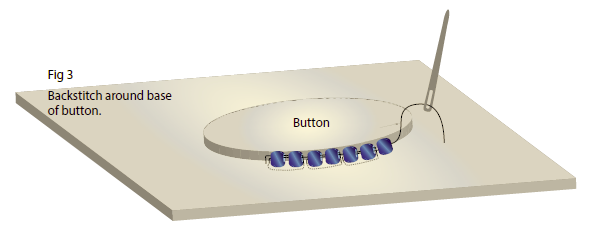
1. Using a basic back-stitch you will stitch 38 11/0 teal seed beads around outer edge of button. (Fig. 3) Begin a basic backstitch by bringing your needle up at the edge of the button, keeping the needle vertical to the button edge. Pick up two teal seed beads. Go down through the surface. Keep beads snug, but not tight. Come back up where you put the needle first, needle back through the same two beads, and then pick up two more. Repeat this all the way around the button edge. Needle down and knot.
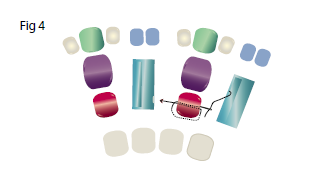
2. Knot thread and needle up from the underside close to a bead in the first row. Pick up one 11/0 rose bead. Needle down through substrate close to that bead. Bring needle up at beginning spot and go back through the rose bead. This will set the first bead of that row. (Fig 4)
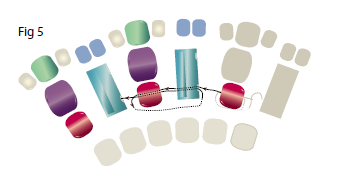
3. Pick up a half Tila and go through one hole (bottom) and one more rose bead. Needle down and back stitch through both beads. Now pick up a half Tila and a rose bead. Needle down through substrate and come back up close to the previous Tila hole. Go back through the Tila and rose bead. Repeat this two bead sequence all the way around. (Fig 5)
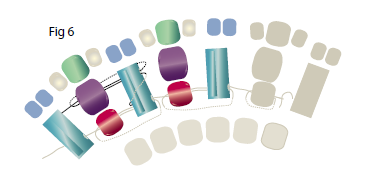
4. Needle back through the next half Tila bottom hole. Go down through the substrate and bring the needle up to the opposite side of the Tila. (Top right side). Go through the Tila top hole, pick up one 8/0 purple bead and go down through the substrate. Back stitch through the top right hole again, going through the 8/0 purple bead. Continue this repeat all the way around the outer edge. Knot off in the back. (Fig 6)
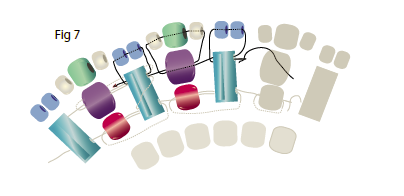
5. Knot thread and needle up through the substrate close to a half Tila top hole. Needle through the top hole going counter-clockwise. Pick up two 15/0 light blue seed beads. Now going clockwise, needle through the Tila again. Needle through the 8/0 purple bead and pick up one 11/0 white bead, one 11/0 lime green bead and one 11/0 white bead. Going counter-clockwise, needle back through the purple bead. Repeat this sequence all the way around. Needle through to the back of the substrate and knot off. (Fig 7)
FINISHING THE PENDANT
1. Using sharp scissors, trim the substrate away close to the beading.
2. Cut a piece of ultra-suede just slightly smaller than the outer edge. Find the center and cut a small slit in the ultra-suede, similar to Fig 1.
3. Add a small amount of E-6000 onto the back of the substrate, avoiding the shank. Spread out to the edge. Push the shank portion of the button through the slit. Press glue-side down onto Ultra suede. Let sit for a minimum 15 – 30 min. to set up.
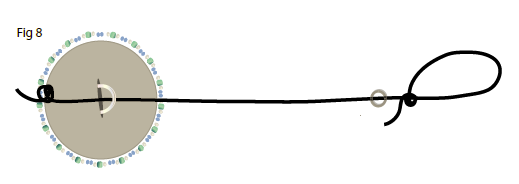
4. Cut a 20" inch piece of round leather cording. Tie a slip knot on one end. Slide on the twisted jump ring. Push the other end of the cording through the button shank. Tie a knot in the end and pull tight. (Optional: apply a small bit of glue to second knot.) Adjust for fit and trim any access cording. (Fig 8)
