Design Inspiration Supplies
Design Instructions
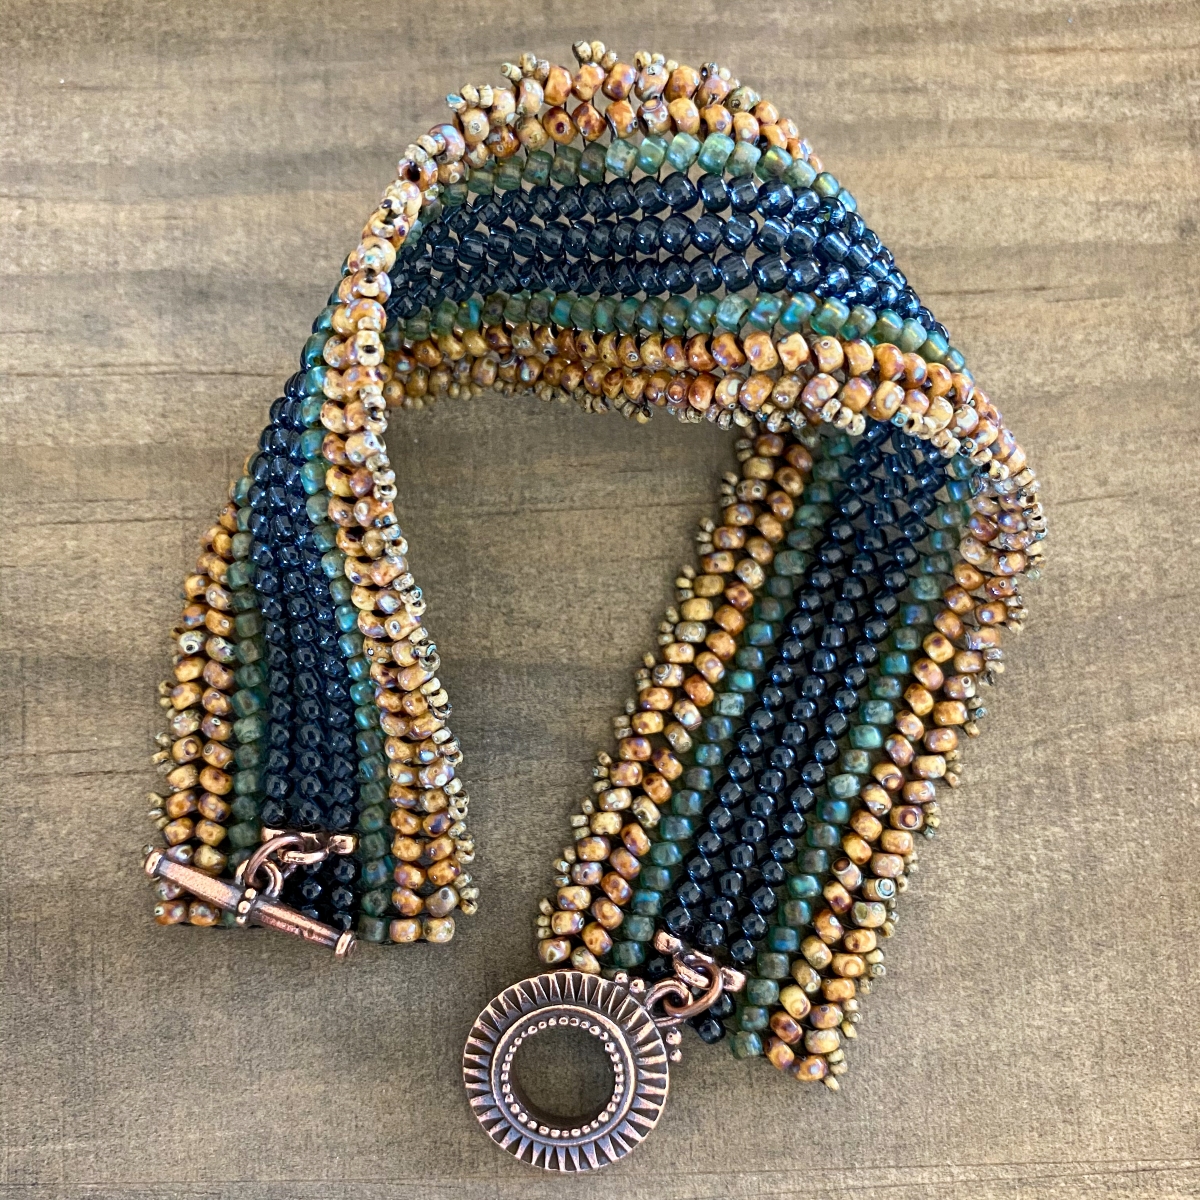
Supplies needed
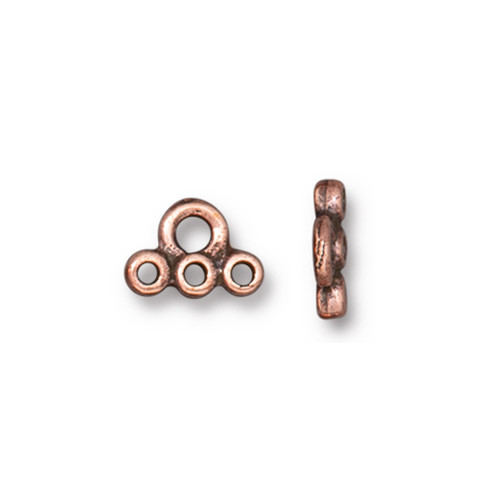
- 2 Stitch-in Connector (94-3232-18)
- 1 Sunburst Clasp Set (94-6021-18)
- 2 Oval Jump Ring 20 Gauge, 4x3mm ID (01-0018-08)
- 9g Size 8 Seed Beads (Color A - Miyuki 4517 opaque brown picasso shown)
- 9g Size 8 Seed Beads (Color B - Miyuki 8-2411 Montana blue transparent shown)
- 9g Size 8 Seed Beads (Color C - Toho Y314F frosted transparent aquamarine Picasso shown)
- 2g Size 15 Seed Beads (Color D - Miyuki 4517 opaque brown picasso shown)
- 6lb Fireline or Wildfire .006 Beading Thread (smoke/black)
Tools
- scissors/thread snips
- size 11 beading needle or looming needle
- set of chain nose and bent nose pliers
- beading mat
Skill Level: Beginning-intermediate
Finished Size: Approx 7”
Designer: Danielle Wickes
Download the Earthly Hues Herringbone Bracelet PDF
Watch our technique videos on the TierraCast Blog (look for Jump Rings).
Introduction
The stitch-in features three holes spaced and shaped to fit as size 8/0 round seed beads. Each of the built-in beads will take the place of a bead in this pattern. This pattern incorporates the stitch-ins in two places to create attachment points for the toggle clasp bar and hoop.
Steps
1. Cut 40 to 50 inches of beading thread. Leaving a 10-inch tail, pick up two Color A beads and go back through the first bead added. Continue through the next bead. Pick up a Color B bead. Go back through the last bead added and go through the Color B bead. Pick up a Color C bead. Go through the Color B bead and continue through the Color C bead just added. [Pick up a Color C bead. Go through the last Color C bead added. Continue through the next, Color C bead] two times. Pick up a Color B bead and go back through the last Color C bead. Continue through the Color B bead. Pick up a Color A bead. Go through the Color B bead and continue through the Color A bead. Pick up a Color A bead, go back through the last Color A bead, and then continue through the Color A bead just added. (Fig 1)

2. Pick up two Color A beads. Go through the Color A bead below. Come up through the adjacent Color B. (Fig 2)

3. Repeat Step 2 six times with the following colors: Color B, [Color C] three times, Color B, Color A. (Fig 3)

4. Pick up two Color A and three Color D. Go back through the first Color A added in this step, heading in the opposite direction of the exiting thread. Pull thread through and the two Color A beads stack, and the three Color D wrap around the top Color A bead. Turn and go up through the adjacent Color A in the row. (Fig 4)

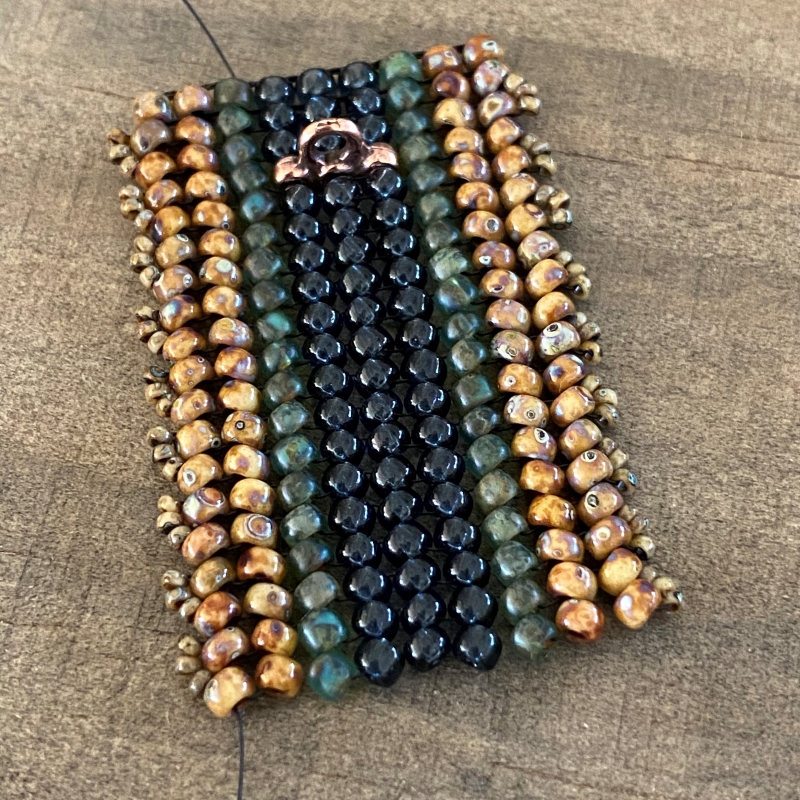
5. Pick up a Color A and a Color B bead. Go through the Color B bead below. Turn and come up through the adjacent Color C bead. Place a stitch-in with the loop side facing up and go through the first loop. Turn and go through the second loop. Go through the next Color C bead. Turn and go through the next Color C bead and continue through the third loop of the stitch-in. Pick up a Color B bead, go through the Color B bead next to the stitch-in. Turn and go up through the adjacent Color A bead. Pick up two Color A beads. Go through the Color A bead below. Pick up three Color D. Go through the last Color A added. (Fig 5)

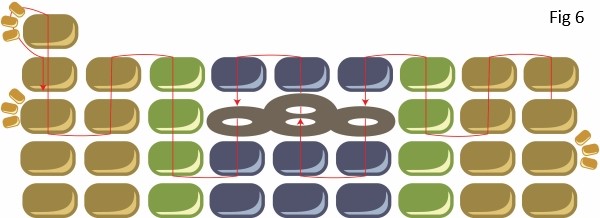
6. Pick up two Color A beads and go through the second Color A bead in the row. Turn and come up through the adjacent Color B bead. Pick up a Color B and a Color C bead and go through the first hole of the stitch-in. Continue through the Color B bead below. Turn and come up through the adjacent B. Continue through the middle hole of the stitch-in. Pick-up two Color B and go through the third hole of the stitch-in. Turn and go up through the adjacent B. Continue through the next Color B bead. Pick up a Color B and a Color A bead and turn and go down through the next Color A bead. Come up through the adjacent A. Pick-up two, Color A and three Color D. Repeat Step 4 to make the odd-count turn. (Fig 6)
7. Complete the remainder of the row following a regular, herringbone stitch in the established pattern. When you reach the end of the row pick up three Color D and come up through the last Color A added. (Fig 7)
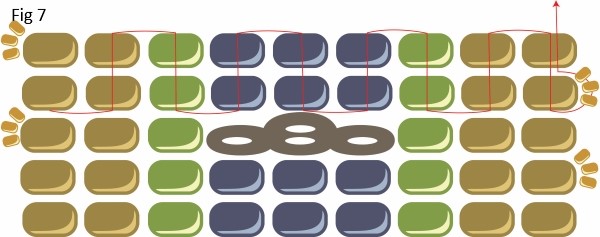
8. Repeat steps 2 through 4, then repeat step 7 to complete the rows of your bracelet to desired length, allowing 1 inch for clasp.
9. Repeat Steps 5 and 6 to add the second stitch-in.
10. Repeat Steps 7 and 8 to add three rows above the stitch-in. Weave in remaining working and tail thread by following the established thread path through two rows and trim.
11. Open an oval jump ring using chain and bent nose pliers and attach to the top loop of the first stitch-in added (the stitch in that has two rows after it). Close the jump ring. Open a second, oval jump ring and attach the toggle bar.
12. Open a third oval jump ring and attach the hoop side of the toggle clasp to the stitch-in top loop. Tip: The bent nose pliers are helpful here in getting the jump ring closed.

