Design Inspiration Supplies
Design Instructions
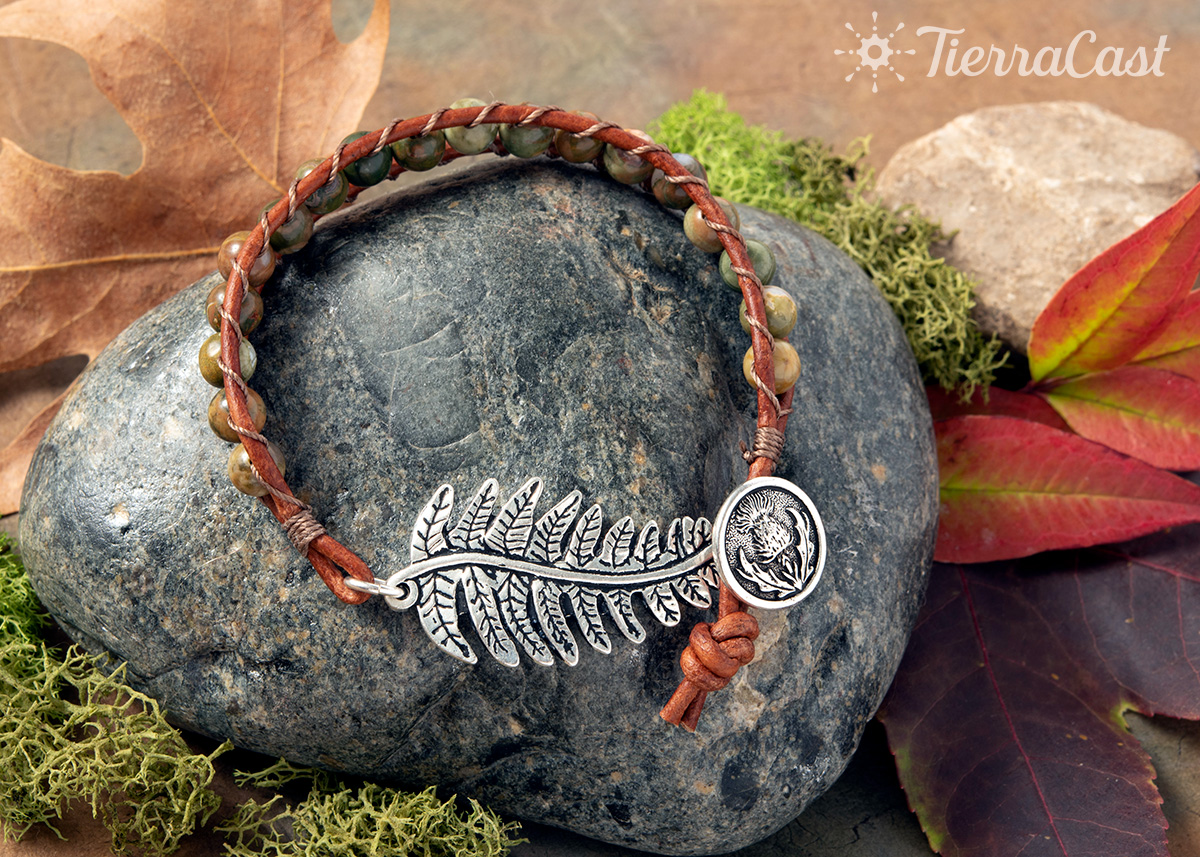
Supplies needed
- 1 Fern Link (94-3241-12)
- 1 Thistle Button (94-6607-12)
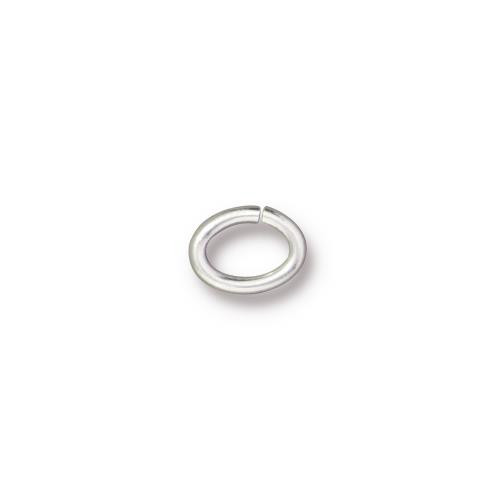
- 2 Oval Jump Ring 17ga 5x3.5mm ID (01-0019-01)
- 48” Nylon Cord such as B-Lon or C-Lon, Fine, Light Brown
- 20” 2mm Leather Cord, Brown
- 25 6mm Gemstone Bead (Rhyolite shown)
Tools
- chain nose pliers (2)
- scissors
- sharp tweezers
- ruler
- super glue
- clip board or board with binder clip
- bracelet bending pliers (optional)
- tape (optional)
Skill Level: Beginner-Intermediate
Finished Size: Approx. 7 1/2"
Designer: Tracy Proctor
Watch the Demo Video: Fern & Thistle Bracelet Jewelry Making Demo
Download the Fern & Thistle Bracelet PDF

Watch our technique videos TierraCast Blog (look for Jump Rings).
Tips: A 7 ½” bracelet uses 18 beads. Two beads equals about ½”. Add or subtract beads as needed for desired bracelet length.
Steps
- Use fingers or bracelet bending pliers to give a gentle curve to fern link. Set aside.
- Create “needles” at ends of nylon cord by applying super glue lightly to about 1” at each end. Use tissue to wipe off excess. Allow to dry.
- Fold leather cord in half and anchor tip of fold to clip board.
-
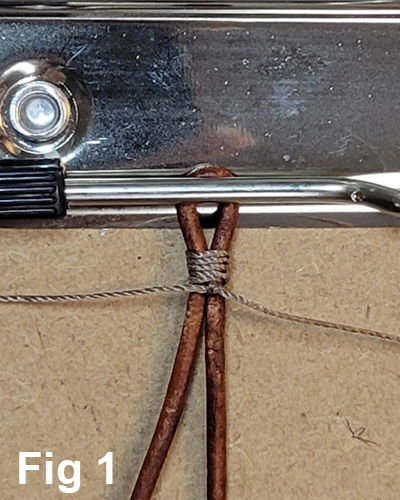
Thread nylon cord (thread) under leather strands (cords) and pull to center. Position near anchor and wrap thread around 5-6 times, creating loop about ¼” long. Make sure all coils are tight, then secure with square or double overhand knot. Tighten securely. (Fig 1)
-
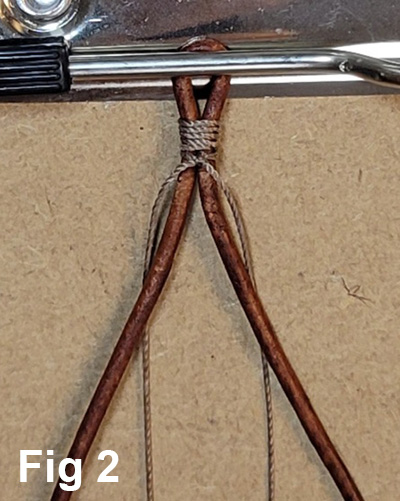
Wrap threads around and under cords. (Fig 2)
-
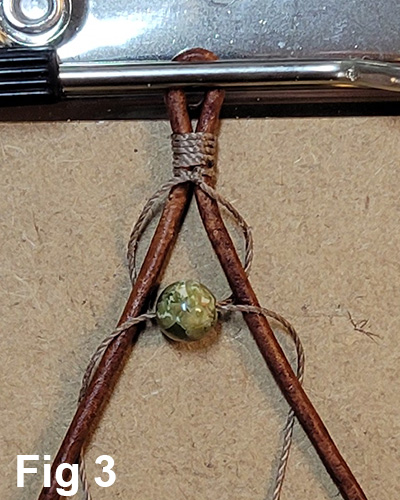
Pick up one bead and pass threads through bead hole from opposite sides, pulling bead up between cords. (Fig 3)
-
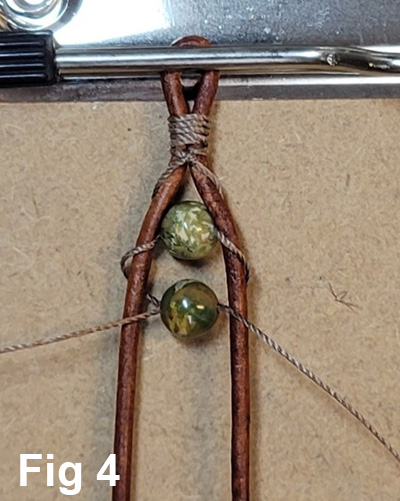
Repeat Step 6 - bring threads around and under cords, pick up bead and pass threads through from opposite sides, bring up to previous bead. (Fig 4) (Hint: at this point it is helpful to tape leather cord ends down to board.)
-
Continue adding beads to desired length. (See Tip) Pull threads tight after each bead is added. As you work watch thread tension. Use tweezers to help tighten if needed. Beads should sit next to each other but not too tightly.
-
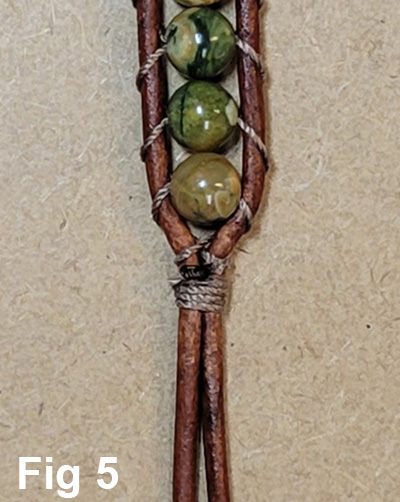
After final bead bring threads around and under again. Without crowding beads* wrap threads around cords 5-6 times to secure them together as in Step 4. *Make sure there is enough room for beads to sit comfortably between cords. Add a tiny amount of glue to knot, allow to dry and trim excess thread. (Fig 5)
- Form button loop by tying an overhand knot in both cords about ¾” from thread wrap. Tighten securely. (Optional: add glue) Trim excess cord.
- Open one jump ring and attach to loop at other end. Before closing attach wide end of fern link. Close jump ring.
- Open one jump ring and attach to narrow end of link. Before closing attach button shank. Close jump ring.


