Design Inspiration Supplies
Design Instructions
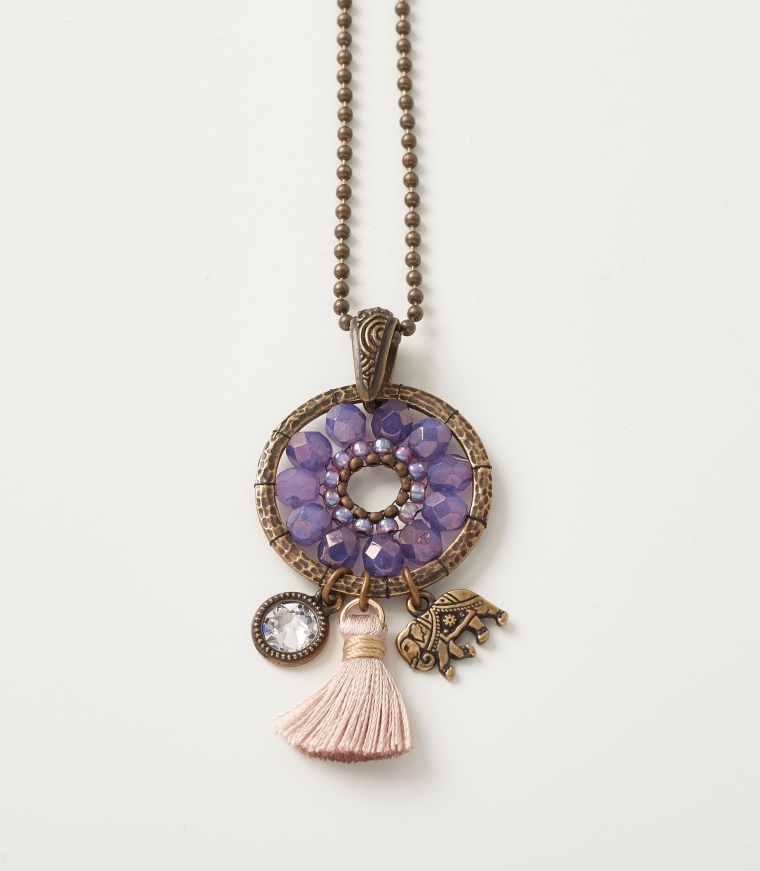
Supplies needed
- 1 Hammertone 1.25” Ring (94-3231-27)
- 1 Spiral Pinch Bail (94-5784-27)
- 30” Ball Chain with Connector (20-1430-27)
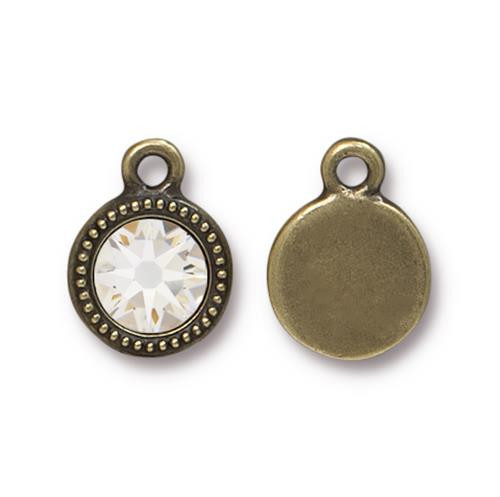
- 1 Crystal Beaded Drop (94-6824-04)
- 1 Gita Charm (94-2176-26)
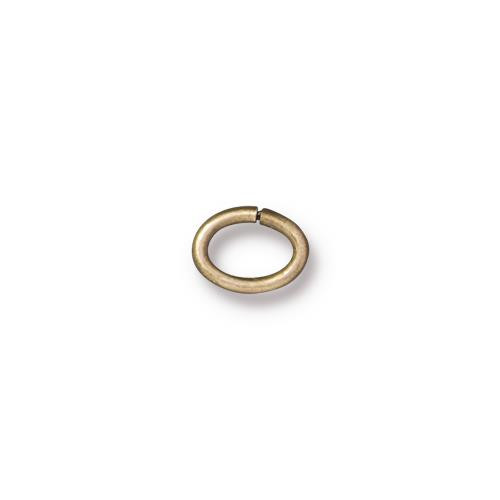
- 3 Oval Jump Ring 17 Gauge 5x3.5mm ID (01-0019-27)
- 1 Small Tassel*
- 11 6mm Fire Polish Beads
- Size 11/0 Round Seed Beads
- Size 8/0 Round Seed Beads
- 6lb Fireline or preferred beading thread
Tools
- thread cutters
- beading needle
- chain and/or flat nose pliers (2)
Skill Level: Beginner-Intermediate
Finished Size: Approx. 2 1/2"
Designer: Danielle Wickes
Download the Gita Dreamcatcher Pendant PDF
* To make your own tassel see tutorial here - At Step 7, replace wire with jump ring, then wrap a length of thread around tassel near top and secure with knot.
Watch our technique videos on the TierraCast Blog (look for Jump Rings).
Steps
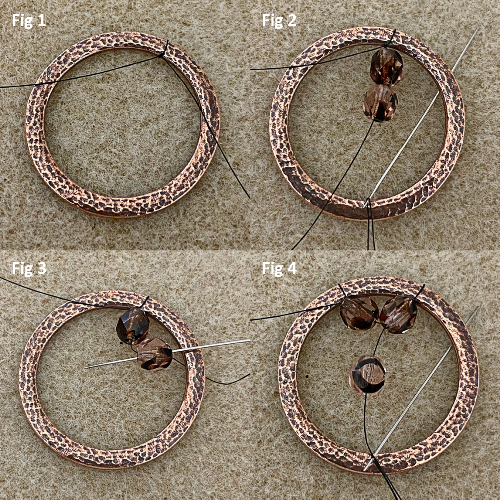
1. Cut 36 inches of Fireline and thread a beading needle. Leaving a 6” tail, begin by tying a double knot onto the component. Tug the knot so that it sits inside the component. (Fig 1)
2. Pick up two Fire Polish rounds and bring them to rest inside the component. The first fire polish bead strung will cover up the knot. Bring the needle behind the component as shown. (Fig 2)
3. Bring your needle around the front of the component and back up through the second fire polish bead added. Thread should be headed in the direction as shown, opposite direction of the exiting thread. (Fig 3)
4. Pull tightly and the beads will sit side by side as shown. Now pick up one fire polish bead, and bring the needle back under and around the component, then back up through the fire polish bead. (Fig 4) Repeat Step 4 to complete the circle around the inside of the component. You should have 10 or 11 beads around. Less crowded is better than trying to squeeze too many in the loop (See Step 5).
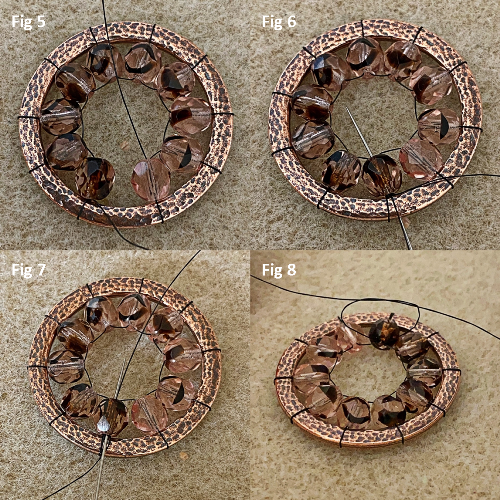
5. Your thread is now exiting the top of the last bead added. To complete the ring, bring your needle down through the top of the next fire polish bead, that was the bead added first in the ring. (Fig 5)
6. Loop around the component and come back up through the same bead. (Fig 6)
7. Bring the tail thread up through the 6mm bead above. (Fig 7)
8. Tie a double-knot with the tail and working thread. (Fig 8)
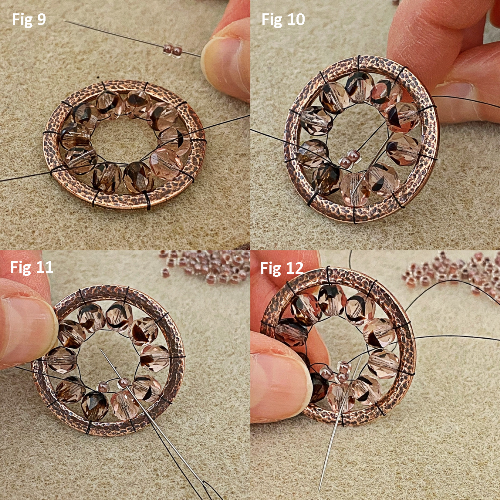
9. Pick up two, size 8/0 seed beads. Slide them down to rest on top of the 6mm beads. (Fig 9)
10. Bring your needle under the thread bridge above the next fire polish bead. Pull tight. (Fig 10)
11. stitch up through the second 8/0 bead added, opposite direction the thread is exiting. (Fig 11)
12. Now pick up one, 8/0 bead and bring the needle under the next thread bridge. As before. Bring the needle back up through that bead, in the opposite direction your thread is exiting. Pull and the bead will sit adjacent to the others. (Fig 12)
Repeat Step 12 around until you reach the first bead added.
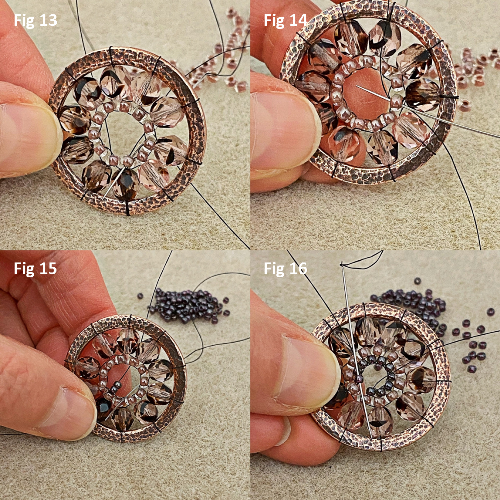
13. Stitch down through the 8/0 bead next. (Fig 13)
14. Loop under the thread bridge below that 8/0 bead and come back up through the bead. This completes the ring of 8/0 beads. (Fig 14)
15. Repeat steps 9 through 11 using size 11/0 seed beads. (Fig 15)
16. Repeat steps 12 through 14 to complete a ring of 11/0 seed beads. (Fig 16)
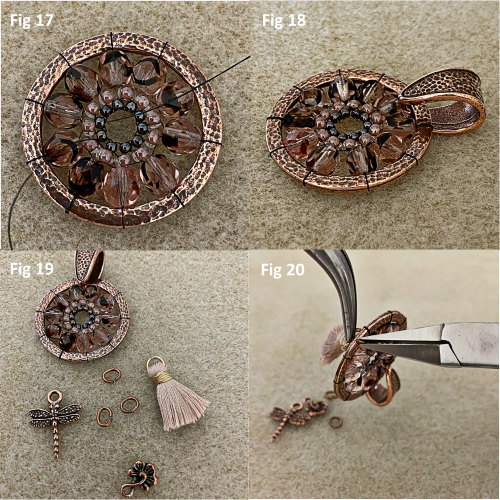
17. Weave in your working and tail threads. To weave in the threads, follow your thread path by stitching down though the next bead, loop around the thread bridge below, and come back up through the same bead. Do this two to three times with the working thread. For the tail thread, twice will be enough. Snip thread ends. (Fig 17)
18. Situate your bail as shown, between two of the 6mm Fire Polish Beads. The bail is soft enough to close firmly between your fingers. If preferred, you can use a nylon jaw or parallel jaw plier. (Fig 18)
19. Open each jump ring using pliers and attach the tassel first. Bring the jump ring onto the hoop and close with pliers. (Fig 19)
20. Placement: You can decide the order and placement you like. I have placed the tassel between the Fire Polish Beads that best approximate the spot straight down from the bail. The other charms are placed into the sections beside the tassel. (Fig 20)
