There are no products listed under this category.
Design Inspiration Supplies
Design Instructions

Supplies needed
- 2 French Hook Niobium Ear Wire, Copper w/Coil (90-5128-12)
- 2 Tree Charm (94-2454-27)
- 16 4mm Hex Spacer (93-0411-70)
- 8 3mm Disk Spacer (93-0439-27)
- 4 2x2mm Crimp Bead (01-0030-27)
- 4 6x8mm Bead (Czech glass faceted rondelle shown)
- 20ga craft wire (Ant. Brass shown)
Tools
- chain nose pliers (2)
- round nose pliers
- flush cutters
- crimping pliers (optional)
- nylon-jaw pliers or wire straightening tool (optional)
- ruler
Skill Level: Beginner-intermediate
Finished Size: 2 1/2-3"
Designer: Tracy Proctor
Download the Sierra Earrings PDF
Watch the Demo Video: Sierra Earrings
Variations from our 8/17/21 FBL
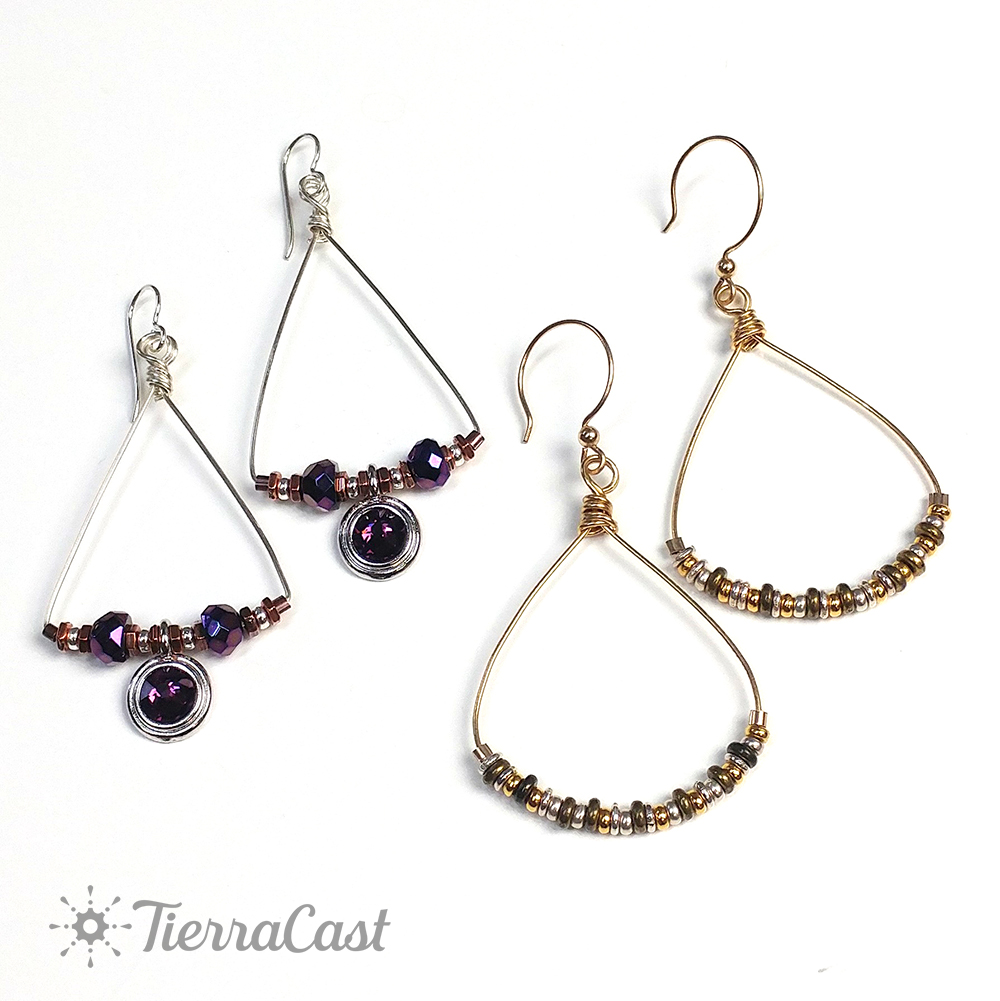
Watch our technique videos on the TierraCast Blog (look for Simple Loops and Wrapped Loops).
Tip: Craft wire is fairly soft - handle gently!
Steps
- Cut one 8” piece of craft wire and use fingers, nylon-jawed pliers or other tool to straighten if necessary.
- Bend wire at right angle 3 ½” from one end.
- String one crimp bead onto longer end of wire. Move bead to bend and use chain nose pliers or front notch of crimping pliers to secure in place.
- String on *one 4mm bead, one 3mm bead, one 4mm bead, one 6x8mm bead, one 4mm bead, one 3mm bead and one 4mm bead*.
- String one charm, repeat * through *, then string one crimp bead.
- Secure crimp bead in place as in Step 3.
- After crimp bead make bend in wire as in Step 2.
- Bring ends of wire together to form triangle 1 ½ - 2” tall.
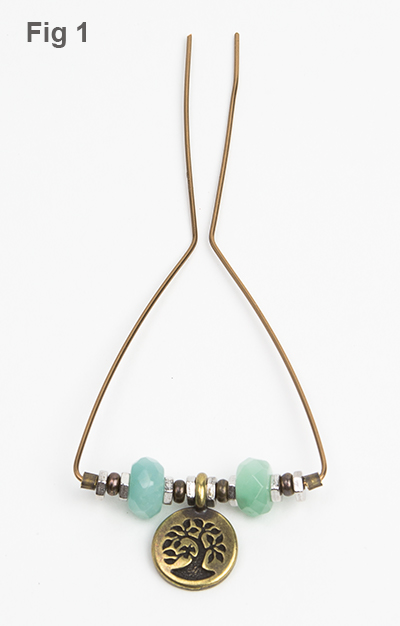
- At top of triangle bend ends of wire straight up, making sure sides of triangle are equal. (Fig 1)
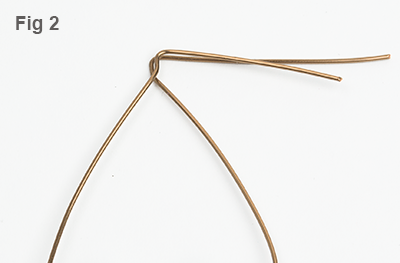
- Grasp wires with chain nose pliers, then bend at right angle above plier jaws. (Fig 2)
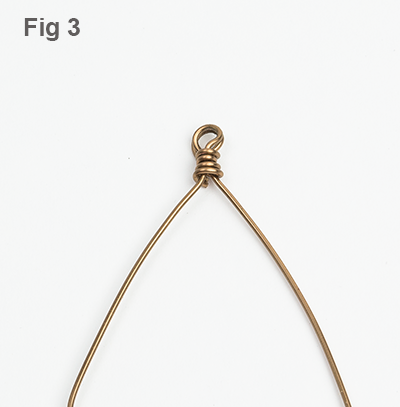
- Use round nose pliers to form wrapped loop. (Fig 3) (Hint: pay attention to which direction charm is hanging to determine where to finish wrap and trim wire.)
- Attach one earwire at top of earring.
- Repeat Steps 1-12 for second earring.