Design Inspiration Supplies
Design Instructions
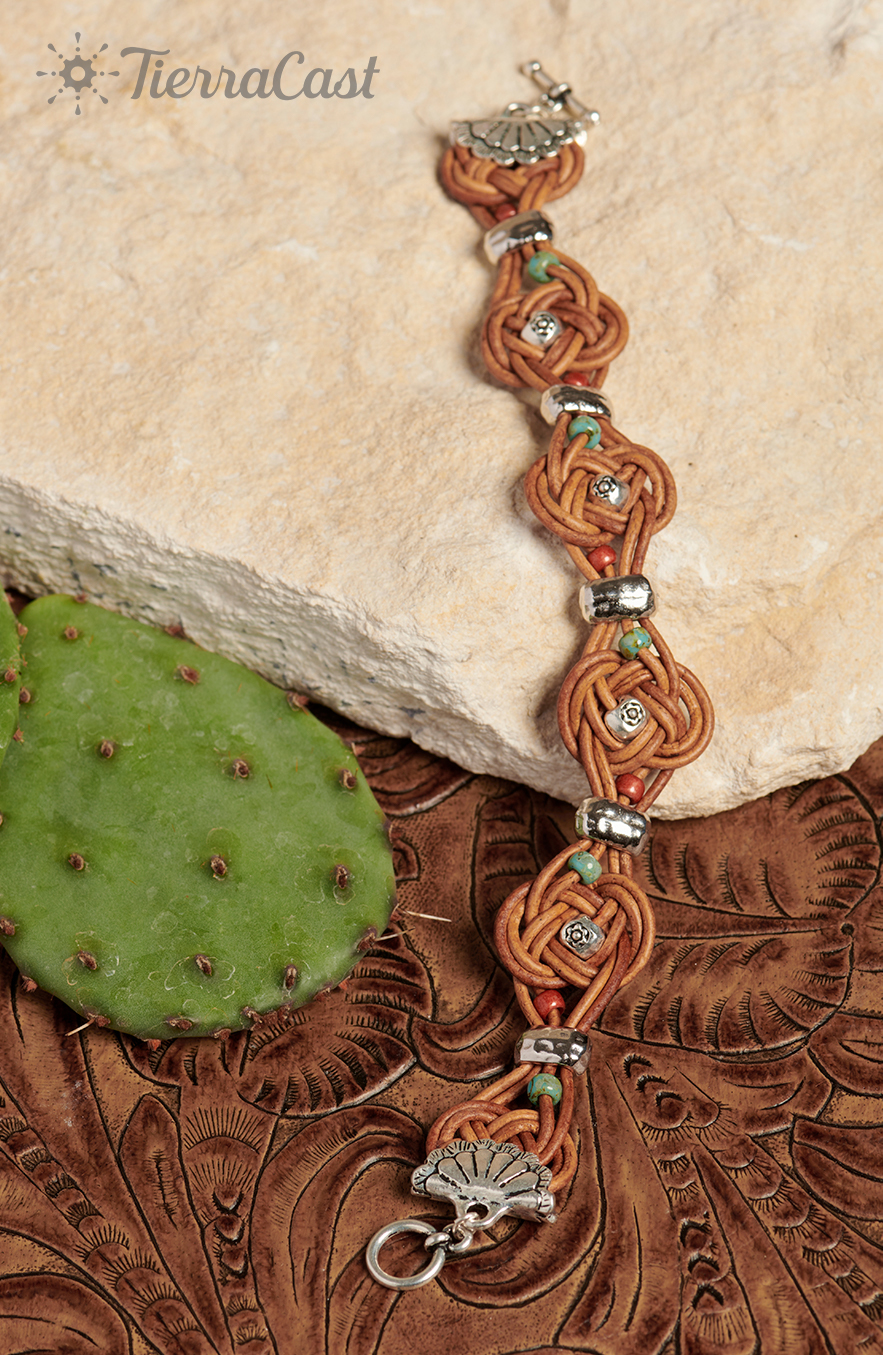
Supplies needed
- 2 Concho Crimp End (94-3237-12)
- 4 Flower Nugget Large Hole Spacer Bead (93-0454-12)
- 5 Distressed 6x2mm Barrel Bead (94-5792-70)
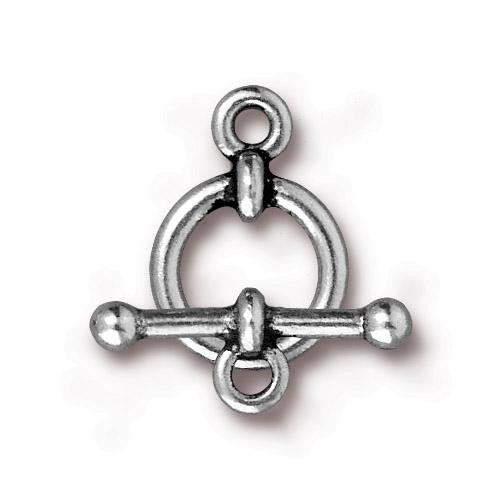
- 1 Anna's 1/2" Toggle Clasp (94-6154-12)
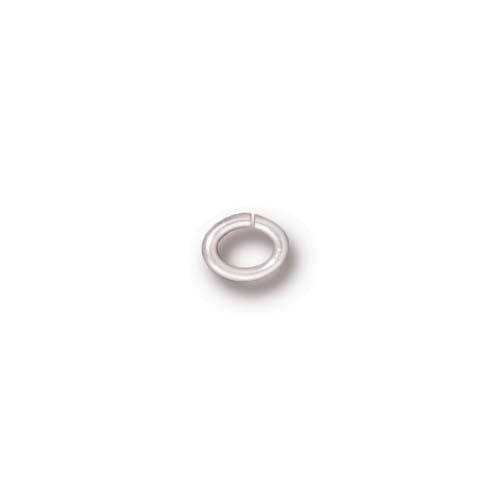
- 3 Oval Jump Ring 3x2mm ID 20ga (01-0016-01)
- 5 Size 6 Seed Bead A, turquoise
- 5 Size 6 Seed Bead B, red
- 80" Round 1.5mm Leather Cord, brown
- E6000 Adhesive or Gel Super Glue
Tools
- chain nose pliers (2)
- flat, nylon-jaw or parallel pliers
- scissors or leather snips
- clipboard or macrame board
- medium binder clip
Skill Level: Intermediate
Finished Size: 7 1/2-8"
Designer: Tracy Proctor
Download the Josephine Knot Bracelet PDF
Watch the Demo Video: Josephine Knot Bracelet Jewelry Making Demo

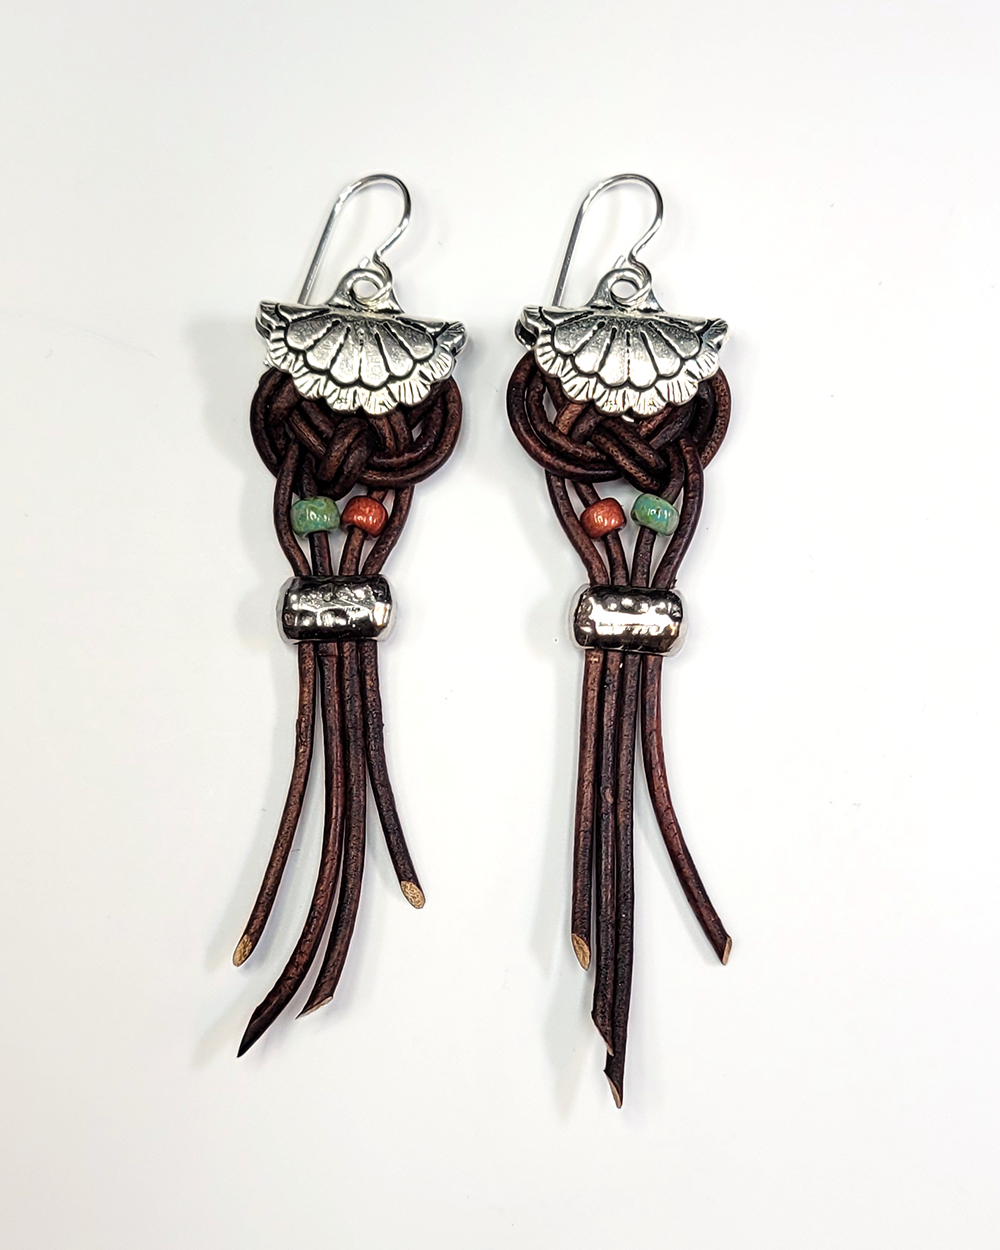
Variation: Try the same technique for these earrings!
Watch our technique videos on the TierraCast Blog (look for Jump Rings).
Tips: Pull on cords firmly from both ends a few times to pre-stretch. Make knots as small as possible while still maintaining a good, even shape. (Looser knots will create a larger finished bracelet size.) Alternating knot direction is optional. If preferred start all knots from the same side.*
Steps
- Cut four 20" strands of cord.
- Tie the cords in an overhand knot at one end and anchor to clipboard.
- Separate cords into two at left (L) and two at right (R).
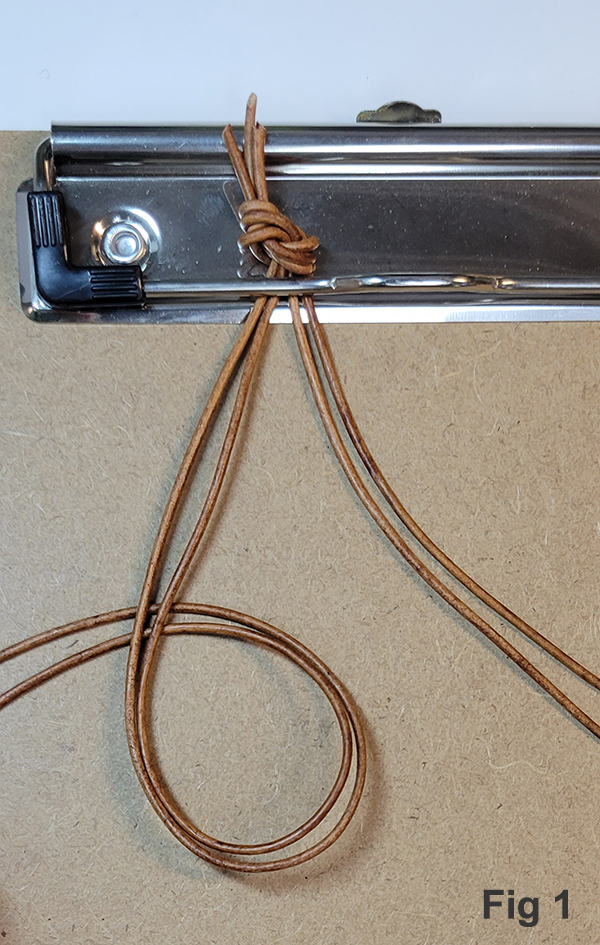
- Loop L cords with tail going under to the left. (Fig 1)
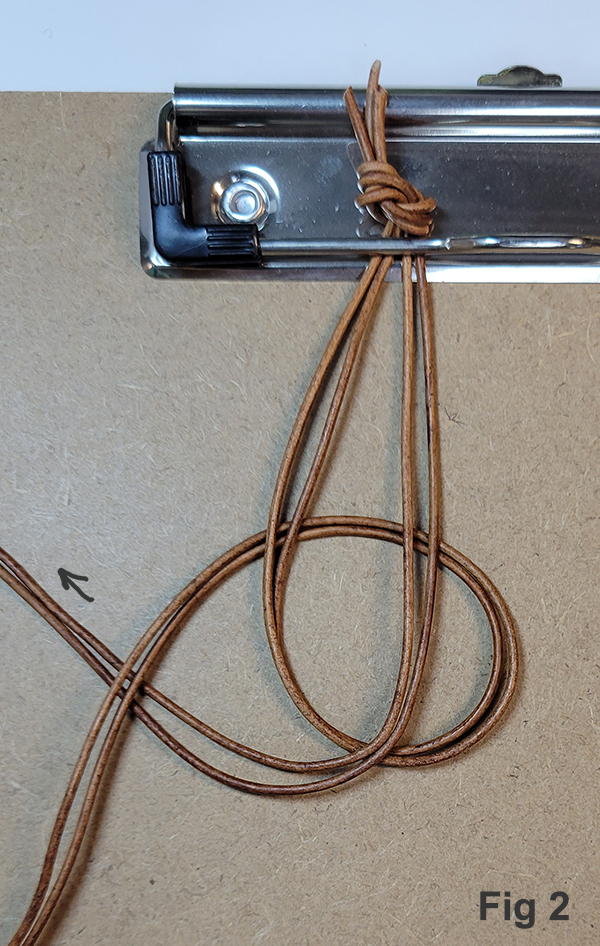
- Lay R cords over loop, and pass under tail from Step 4. (Fig 2)
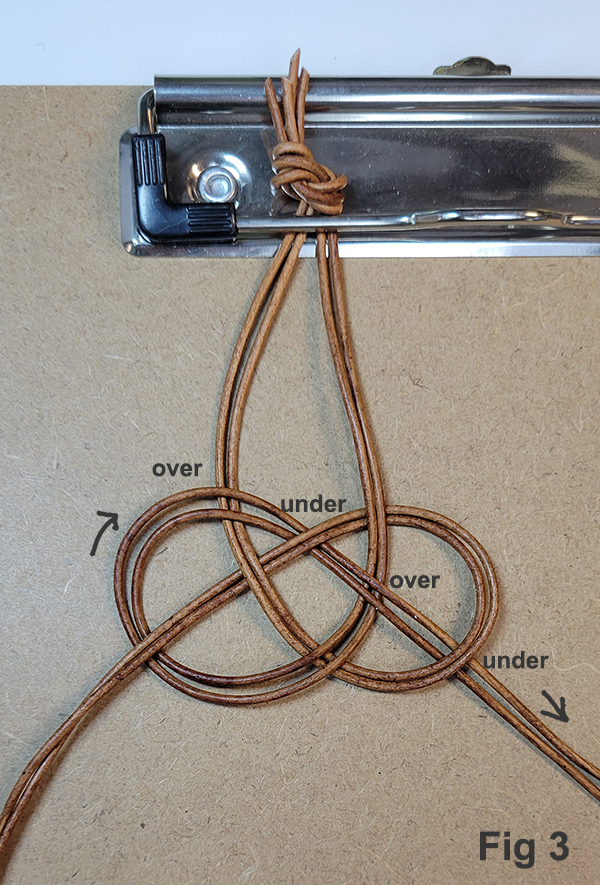
- Loop R cords over upper L cords, under upper L loop, over R cords and under lower L loop. (Fig 3)
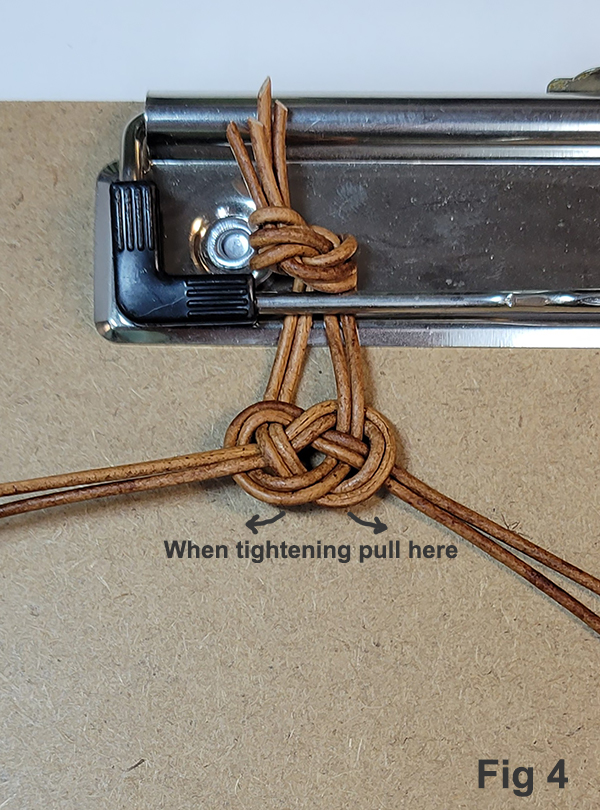
- Tighten and bring knot to top of clipboard, straightening cords and eliminating overlaps. For easiest tightening grasp cords where loops overlap at bottom and pull away from each other. (Fig 4)
- String 1 A bead onto inner strand of left tail, 1 barrel bead onto all 4 cords, and 1 B bead onto inner strand of right tail. Move all up to knot.
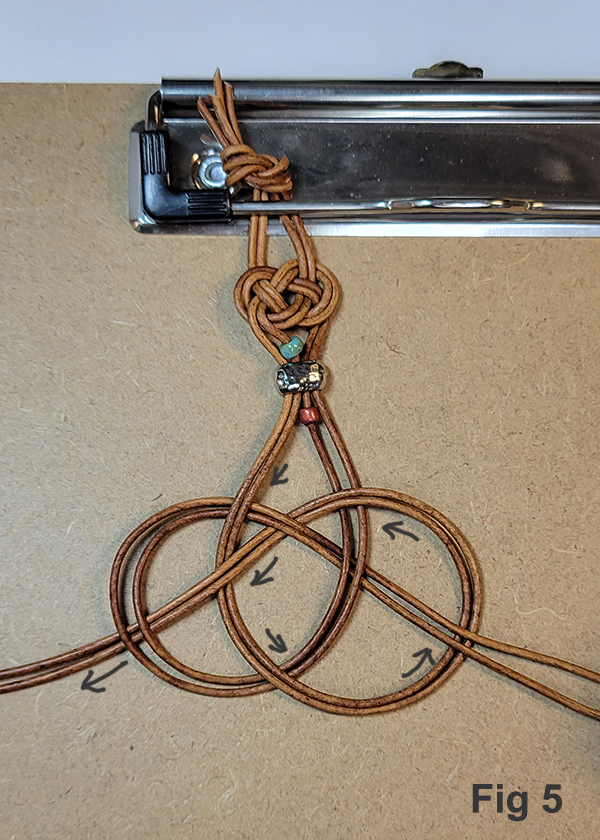
- Begin another knot from the other side*, starting by looping R cords with tail going under to the right. Continue, laying L cords over the loop and weaving through knot. (Fig 5)
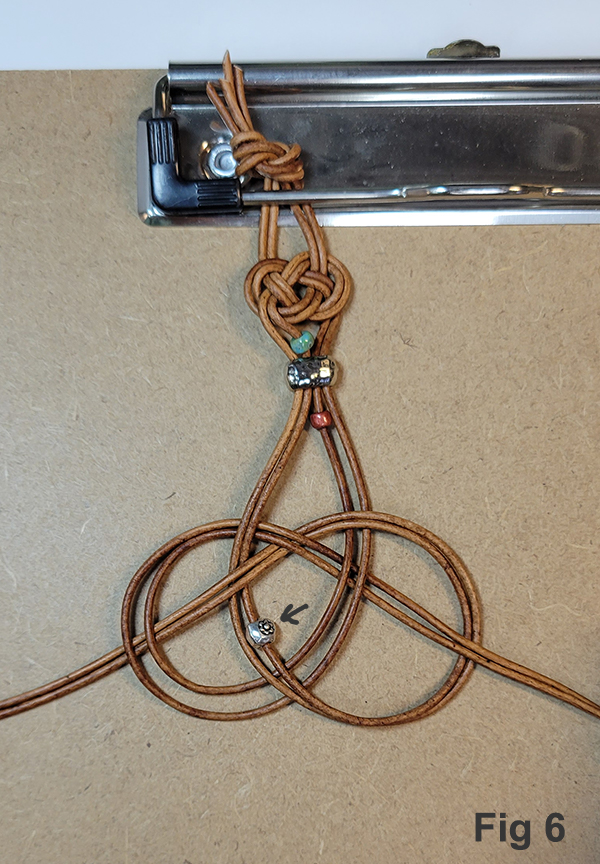
- Before tightening, string 1 flower bead onto inner strand of left tail and weave it into the center of the knot. (Fig 6) Tighten. Distance between knots should be 1/2-5/8". Adjust if needed.
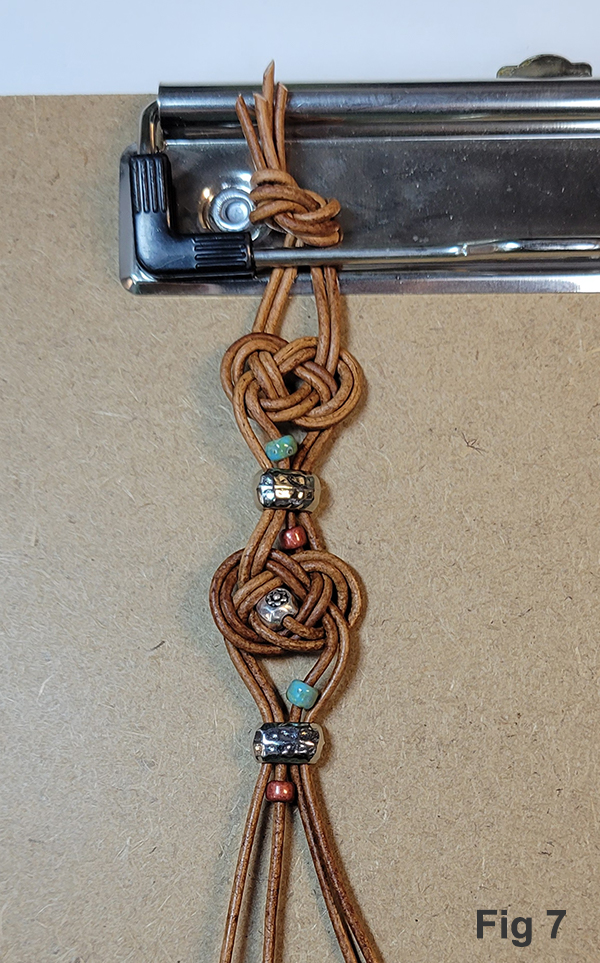
- String 1 A bead onto inner strand of right tail, 1 barrel bead onto all 4 cords, and 1 B bead onto inner strand of left tail. Move all up to knot. (Fig 7)
- Repeat Steps 4-7, adding a flower bead to the inner strand of right tail before tightening.
- Repeat Steps 8-12 once more.
- Repeat Step 9 to form final knot omitting flower bead.
- Double check length of bracelet, allowing 1 1/4" for clasp. Tighten knots and adjust length between knots as needed.
- After final knot cut tails to 1". Bring tails together and use a binder clip to hold. (Fig 8) Apply adhesive to knot underneath both tails. Untie knot at other end of bracelet and repeat. Allow to dry, then trim tails close to knots.

- Apply adhesive to the inside surfaces of 1 crimp end and place over knot at one end of bracelet. Use flat or parallel pliers to gently close crimp down onto knot. Repeat at other end. Allow to dry.
- Use 1 jump ring to attach clasp ring at one side of bracelet. Use 2 jump rings to attach clasp bar at other end.


