Design Inspiration Supplies
Design Instructions

Supplies needed
-
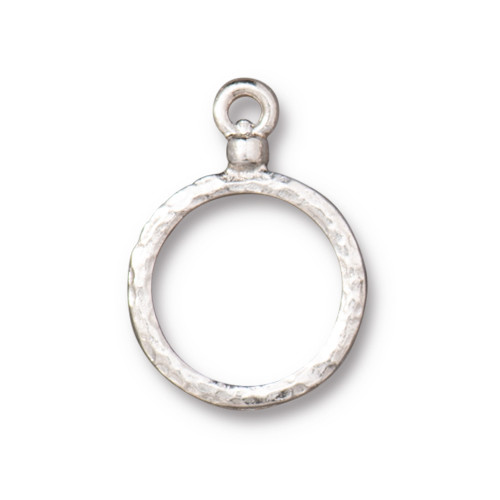
7 Stitch-around Hoop 15mm (94-2561-70)
- 1 Craftsman Clasp (94-6205-70)
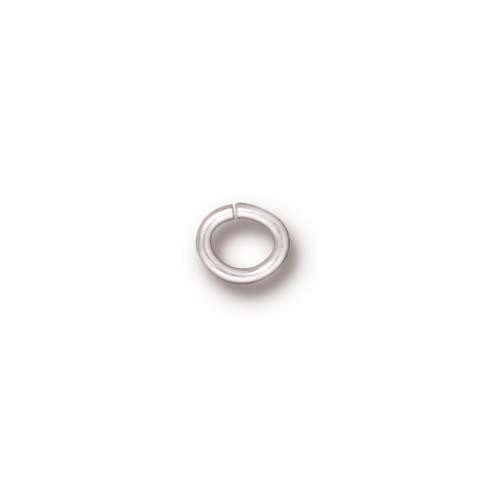
- 10 Oval Jump Ring 20 Gauge 4x3mm ID (01-0018-01)
- 63 3mm Czech Glass Fire Polish Beads (9 each white, aqua, orange, yellow, red, purple, and blue)
- 7 2.5mm Czech Glass Fire Polish Beads (1 each white, aqua, orange, yellow, red, purple, and blue)
- 11/0 Round Seed Beads to match Czech bead colors
Tools
- thread cutter
- beading needle
- chain and/or flat nose pliers
- beading mat
- optional: thread burner
Skill Level: Intermediate
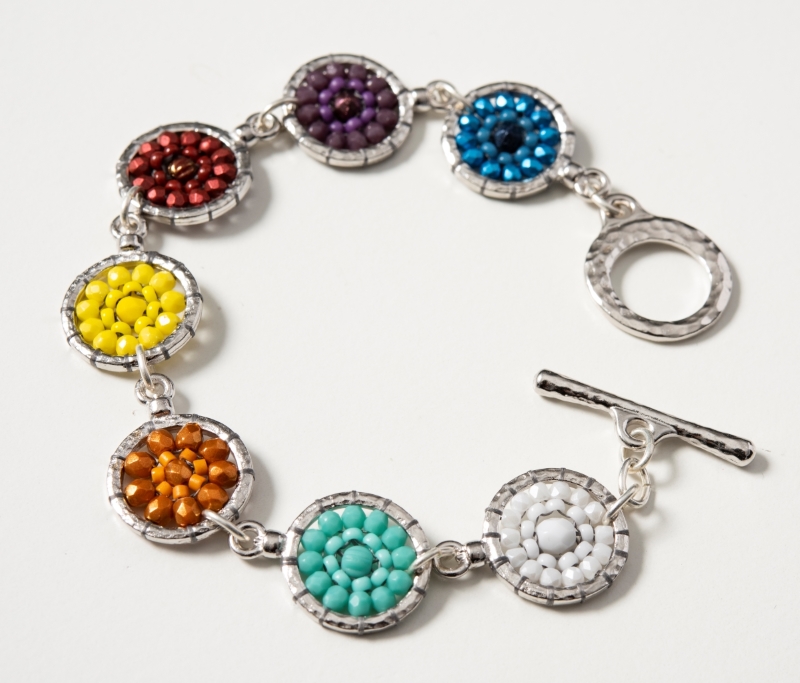
Finished Size: Approx. 7 1/2”
Designer: Danielle Wickes
Download the Mosaic Bracelet PDF
Watch our technique videos on the TierraCast Blog (look for Jump Rings).
Tip: The mosaic hoops can be made with beads in other size arrangements. See note at the bottom of the instructions for options. Weaving note - when needling through the beads "up" means towards the center of the hoop, "down" means towards the rim.
Steps
1. Cut an arm’s length of thread (approx. 30”). Use a double overhand knot to tie the thread onto the hoop component near the top loop leaving a 6” tail. (Fig 1)
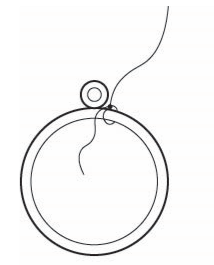
Fig 1
2. Ring 1: Thread needle onto working thread and string on two 3mm beads. Bring needle in front of and around then back up behind the hoop. Come back up through the second fire polish bead added. (Fig 2)

Fig 2
3. Pick up one fire polish bead. Again go around the hoop and back up through the fire polish bead just added. Repeat this six more times. Thread will be exiting the last fire polish bead added, as shown. (Fig 3)
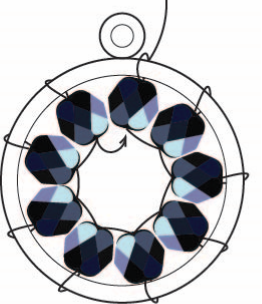
Fig 3
4. To close up the ring, bring needle back down through the first fire polish bead added. Loop around the component and come back up through the same fire polish bead. Thread will be exiting as shown. This completes Ring 1. (Fig 4)
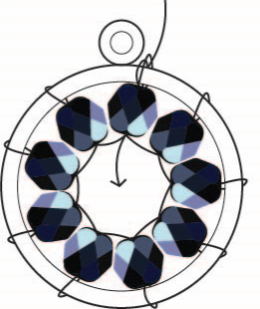
Fig 4
5. Ring 2: Pick up two size 11/0 round seed beads. Bring needle under the thread bridge between the second and third fire polish beads added in ring 1. Bring needle back up through the second 11/0 seed bead added. (Fig 5)
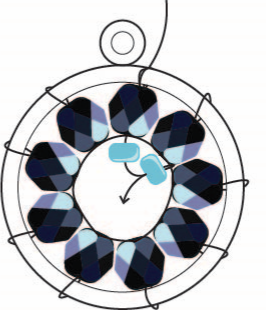
Fig 5
6. Pick up one 11/0 seed bead. Needle under the thread bridge between either the 3rd and 4th fire polish of ring 1, or between the 4th and 5th fire polish. You will need to feel this out a little and see how they sit. Bring needle back up through the 11/0 bead just added. Repeat this step three more times. Bring needle down through the first 11/0 bead added, loop under the thread bridge between the first and last fire polish beads of Ring 1, come back up through the 11/0 bead. Thread will be exiting as shown. This completes Ring 2. (Fig 6)
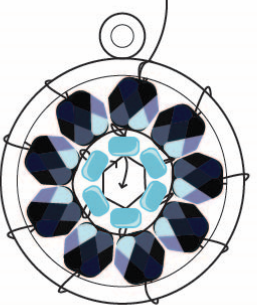
Fig 6
7. Center bead: Pick up 2mm bead, then bring needle down through the 11/0 bead below, loop around the thread bridge under it, then come back up through the 11/0 bead and the 2mm bead. Continue through the 11/0 bead above and loop around the thread bridge above it. Come back down through the 11/0 bead, the 2mm bead, the 11/0 bead below it, and continue through the nearest 3mm fire polish bead below that. Loop around the component and come back up through the 3mm fire polish bead. (Fig 7)
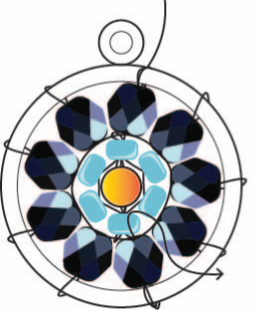
Fig 7
8. Weave in working thread and tail thread: follow the thread path around, going back down through the next fire polish, looping around the component, then back up through the fire polish bead. Do this two or three times, then snip or thread burn the remaining thread.
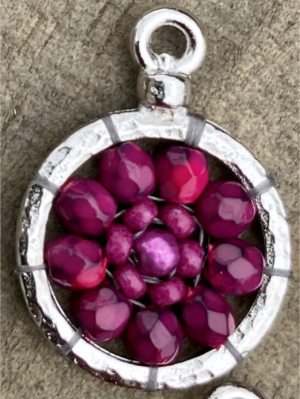
Fig 8
9. Repeat Steps 1-8 six more times with the remaining hoops and colors in your palette.
10. Arrange the hoops as desired on work surface. Open one jump ring and attach it to the loop of the hoop at one end of the bracelet. Before closing jump ring attach clasp ring. Close jump ring.
11. Open one jump ring and attach it to the rim of the hoop between two beads on the opposite side from the loop. Before closing attach the loop of the next hoop. Close jump ring.
12. Repeat Step 11 until all hoops are connected.
13. Open one jump ring and attach to final hoop between two beads on the opposite side from the loop. Close jump ring. Attach a second jump ring to the one just placed. Use a third jump ring to attach the clasp bar.
Bead options: Other bead sizes will work great with these hoop components. Here are other combinations to try ~
Fig 9: 2.5mm Fire Polish beads, 11 to 12 around for Ring 1, 11/0 round seed beads, 7 to 8 around for Ring 2, one 3mm round bead as the center bead, such as a melon, druk, English cut, pearl or fire polish bead.
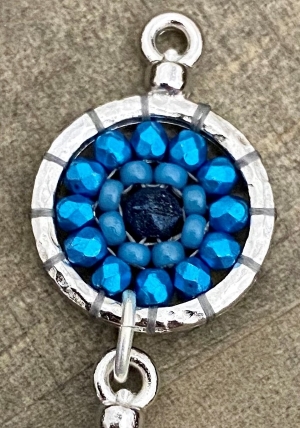
Fig 9
Fig 10: True 2mm Fire Polish Bead, 14 around for Ring 1, 11/0 round seed beads, 9 around for Ring 2, one 4mm round bead as the center bead, such as a druk, pearl or a fire polish round.
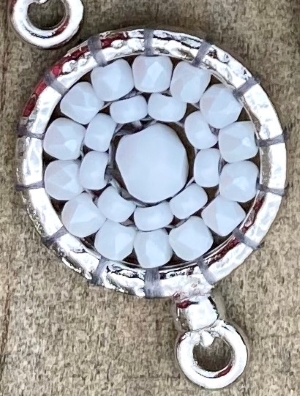
Fig 10
Fig 11: 3mm Fire Polish beads, 9 around for Ring 1, 11/0 delica beads, 7 around for Ring 2, one 3mm round bead as the center bead.
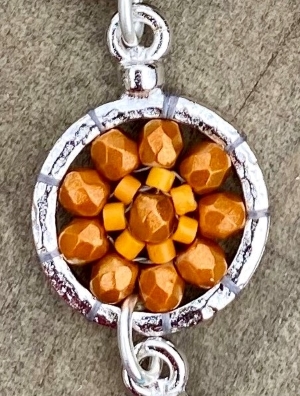
Fig 11
